Sunday, November 29, 2009

Tabbouleh

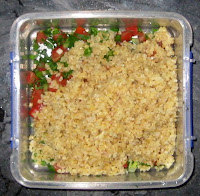
 Ok so this one was a bit of a throw together. My lunches for this week are rosemary lamb fillets with tabbouleh. The rosemary lamb was pre-marinated so not much to show you there! So i thought i'd put up the tabbouleh i made. Sorry about the shocking photos.


Ingredients (per serve)
  • 1/4 cup bourghul (in the health food section of your supermarket, or go to a health store or specialty deli)
  • 3/4 cup parsley, finely chopped
  • 1/4 cup mint, finely chopped.
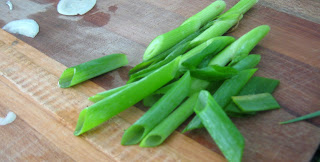
  • 1 large scallion, finely chopped
  • Juice of 1/2 a large lemon
  • About 2 inches of cucumber, seeded and finely chopped
  • 1 clove garlic, crushed
  • 1 1/2 tbs extra virgin olive oil
  • 1 tomato, diced

Method: 

 
Soak the burghul in a bowl of cold water for 1 hour then drain well.
Add all the ingredients together in a bowl and mix thoroughly.
Chill for at least 2 hours before serving.
Note: It should look a lot greener than this; when i made it i used too much burghul so i have already adjusted the recpe. 

$5 meals - Chicken and Sweetcorn Soup

When i was little, my mum used to make me this soup. It was my favorite food, and when my birthday came around, and she asked me what i would like to eat on the day, it was often chicken and sweetcorn soup! Hers tastes so much better than the Chinese take-away variety, and doesn't have that sickly thickness that those soups seem to have. I've stuck pretty closely to the way that i think mum makes it, but i've omitted the ham (i forgot to buy it!). To add an extra dimension, add about 100gm of chopped up smoked ham to the soup at the start.


Ingredients (Serves 4)
  • 1L reduced salt chicken stock
  • 500gm chicken fillets, skinless
  • 3 scallions, thinly chopped
  • Light soy for seasoning
  • 4 small ears of corn, or about 2 cups of corn kernels.
  • 2 eggs
  • 1 tbs water

Method:
To shred the chicken first steam it for about 20 minutes to cook it through (better to overcook than under, as the soup will reduce any dryness anyway and its a little easier to shred when it's not super moist).
Let the chicken cool and then shred by hand (a laborious process, took me 2 episodes of Golden Girls!)
Set the chicken aside.
Remove the corn kernels from the ears by running a knife down the sides.
Puree 1/2 of the corn in a blender with a bit of the chicken stock.


Pour the puree, stock, chicken and remaining corn into a large pot and cook over medium heat for 1 hour, covered.


Add the scallions 5 minutes before ready to serve, reserving some for garnish.
(A bit that i forgot)
Lightly whisk the eggs with the tbsp of water.
Slowly pour the eggs into the soup, constantly stirring the soup with your other hand.
This will create thin whisps of egg throughout the soup which adds a different texture, and richness.
Taste the soup. If it needs it, add soy sauce to taste.
Eat up and think of mum.

Thursday, November 26, 2009

Pho Bo


Okay i have a confession... before making this dish i had not actually ever eaten Pho before. It's pretty rare that i go to a Vietnamese restaurant. So i have no idea whether i actually made a decent pho or not. However, what i CAN say is that i understand why everyone loves this dish. The rich broth of spices and beef, the tender shavings of beef, the zing of the lemon, the burst of the handfuls of fresh herbs. It is quintessentially... Vietnamese. Makes me want to go there so badly! The one bad thing about pho is the work that goes into the stock. It seems like this should be a fast and easy meal, however if you don't have the broth on hand it's loooooong.


Ingredients

The Broth (makes 2 litres or 4 serves)
  • 500gm chicken bones or wings
  • 1kg soup bones
  • 500gm osso bucco or beef brisket (basically a cheap beef)
  • 6 star anise
  • 2 cassia sticks
  • 5 chinese cardammon
  • 1 large onion, in thick slices
  • 3 inches of ginger, in coins
  • 12 cups of water
  • 1 tsp salt
  • 1 tsp sugar


The Rest (per serve)
  • 85gm good steak (tender but lean)
  • 1/2 cup coriander, including chopped stalks (thats where the flavour is)
  • 1/2 cup thai basil, torn
  • 1 long chilli, sliced
  • 2 spring onions, sliced on the diagonal
  • A handful of bean sprouts
  • 60gm pho rice noodles

To garnish
  • Lemon wedges
  • Nuoc Nam fish sauce


Method
The Broth
Somehow or another char both the onion and the ginger until they look burnt. IF you have a grill or burner, easy! If like me, you don't, just fry with no oil. Set aside.


Place all of the broth meats in a large pot and cover with water. Bring to the boil. Discard this first run of water.
Add the ginger, onions and spices, and the 3 litres of water. Bring to the boil then reduce to a low simmer.
Cook for as long as you have (2 hours minumum; the longer the better), skimming the surface muck off occasionally, and reducing it to 2L.


Strain the stock and refridgerate.


When ready to use, remove the stock from the fridge and skim off the layer of fat that will have settled on top.


The Rest
Slice the beef as thinly as possible. Easiest way is to freeze the beef first, then this will be easy. Set aside.


Cook the rice noodles as per instructions and run through cold water to stop them cooking. Set aside.
Bring the required broth to a boil (approx 1.5 - 2 cups per person) and leave boiling heavily.
Place the noodles and coriander into the serving bowls, and lay the beef slices on top.


Ladel over the boiling soup; this will cook the beef.
Add the chilli, basil and spring onions.
Serve with lemon and nuoc nam so that people can adjust the soup to their own tastes.

Enjoy!

Tuesday, November 24, 2009

Basic Oyako Donburi

Oyako Donburi is one of my favorite Japanese comfort foods. Beating it is katsu don however when i saw how many calories that dish has, i freaked out and decided to go for the healthier alternative. The word 'Oyako' i believe can be translated to 'mother and son' and refers to the chicken and egg that dominate the dish. Served over sticky Japanese rice and ladelled with a sweet dashi broth, Oyako Donburi is very easy to make, but takes a short while to cook properly.


Note that this is the most basic version! Feel free to add whatever tickles your fancy: shitake mushrooms, tofu pieces, chilli, anything!


Ingredients (per serve):
  • 150gm skinless chicken breast, sliced
  • 3/4 cup dashi broth (i used chicken broth because i dont like dashi much)
  • 1/2 a white onion finely sliced
  • 1tbs mirin
  • 1tbs light soy
  • 1 large egg lightly beaten
  • 2 spring onions sliced on the diagonal to garnish
  • Japanese steamed rice 1 cup, to serve
  • 1 tsp peanut oil


Method: 

Heat the oil in a pan over med-low heat (note that the pan should be small enough so that when the dashi is poured in, it will cover at least half of the chicken slices).
Layer the onions on the bottom of the pan. Do not stir them!


After 5 or 6 minutes of letting the onions sweat and begin to caramelize, lay the chicken sliced on top. Still don't stir!


Gently pour in the wet ingredients.


Poach until the liquid has halved in quantity and the chicken is fully cooked.
Pour the egg over the top of the mixture (DONT STIR) and let the pan simmer until the egg is almost cooked.


Using a spyder (or whatever you can), transfer the chicken, egg and onions over the bowl of steamed rice, trying to move each serve in 1 piece.
Ladel over the remaining broth and garnish with the spring onions.


Saturday, November 7, 2009

Carnitas with Salsa and Salad

 Summer and Mexican food go so well together. The spice and freshness of the cuisine, made properly, is so light and yet satisfying. Don't be fooled into thinking of your local Taco Bill as Mexican fare. That's Tex-Mex and there is a substantial difference. Do away with stodgy! But keep the margarita :)

Carintas is a shredded crispy pork that is often used as a filling for tacos and burritos, similar to the shredded beef we're all accustomed to here in Australia. The thing i love about this version of carnitas is the crispiness achieved on the outside of the chunks of pork, begging to soak up the tangy salsa and creamy sour cream sides.

This salsa is pretty close to the stuff you get in jars, old el paso style. Although i tend to prefer the fresher, zingy salsas, this one paired well with the carnitas and side salad.


Ingredients
Carnitas
  • 1kg boned pork shoulder, cut into 15cm chunks
  • 1 cinnamon stick
  • 2 bay leaves
  • 1 tsp chili pepper
  • 1 tsp paprika
  • 3 garlic cloves, minced
  • Olive Oil
  • Water
  • 1 tbs salt


Salsa
  • 5 tomatos, seeds removed, and diced
  • 1 green capsicum, pith removed, and diced
  • 1/2 brown onion, diced
  • 1tbs olive oil
  • 1tbs tomato paste


Method:
Carnitas


Rub the salt over each of the pork chunks, and refridgerate overnight
Place crock pot over medium heat with 1tbs of vegetable oil
Place pork chunks into the pot and brown well on all sides, moving as little as possible.


Remove pork chunks and set aside.
Add 1 cup of water to crock pot and scrape off the yummy caramelized bits off the bottom of the pot.


Add spices and stir.
Place pork chunks back into the crock pot, and fill pot with water until pork is 2/3 submerged.
Place in an oven at 180 degrees for 3 1/2 hours, turning regularly, or until pork is flaky and liquid is most evaporated.


Remove pork chunks and flake into bite sized pieces.
Place pork back into pot and into the oven, uncovered.
Turn pork regularly until all liquid is evaporated and desired crispiness of the pork is achieved.


Salsa
Bring a saucepan to medium heat with the oil.
Add the onion and saute for 3-4 minutes or until softened.
Add all other ingredients and bring to boil.
Reduce heat and simmer for 5 minutes.
Refridgerate until cold.

Serve the carnitas hot, along with the salsa, a side salad, and a dollop of sour cream. Perfect summer fare. Alternatively serve into tortillas (if you don't forget to buy them like i did).


'Traditional' Tzatziki.... sorry George!

I've poached another recipe from George Calombaris, however i've changed it up a bit to suit my tastes! Tzatziki is equally my favorite dip, along with French Onion, and 'New Zealand Dip' which my friend Darryl introduced me to (ill see if i can nick the recipe sometime). 


George called this 'Traditional Tzatziki' and it certainly tastes markedly different from the stuff that i am used to. I actually prefer regular tzatziki, however this one is worth a try for something different. I was hoping that this would be the rich, creamy tzatziki that is served at Hellenic Republic. But i'm still on the hunt.


Ingredients
500gm greek natural yoghurt
1 cucumber
1/3 cup olive oil
1tbs white vinegar (though i prefer the zing of lemon)

1tbs maluka honey (George says double the amount, but it was too sweet for me)

1tsp cayenne pepper
1/2 tsp salt


Method (kinda basic!)


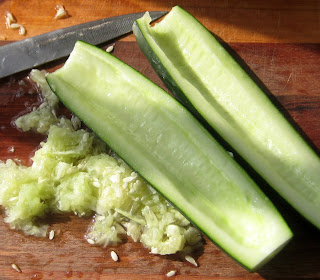
Split the cucumber in half and scoop out the seeds with a spoon. Then dice into 1/2cm cubes. 


Add all other ingredients and mix
Refridgerate until very cold. 
The dip will improve overnight.
Serve with bread, crackers, or sticks of carrot and celery!


Spicy Sichuan Cucumber Salad


Finally getting around to posting my Sichuan meals from a couple of weeks ago. I adore Sichuan food. Even though i'm not great at handling ultra spicy food, there's something incomparable about Sichuan cusine, with the heavy lashings of pepper, spice, garlic, and salt that makes me salivate just thinking about it. The one thing that irks me though, is that at places like Dainty Sichuan, i can't find anything other than boiled rice as a palate cleanser! My mouth is searing from the moment i walk in, with no salvation until i literally run to the gelato shop after dining. This dish is a little bit toned down, and the cucumbers has a nice cooling effect on the palate.


Ingredients:
  • 2 medium cucumbers
  • 1 tsp dried, crushed chilli
  • 1 tsp salt
  • 1 tsp sichuan peppercorns
  • Sesame oil
  • 2 cloves garlic, minced
  • 1tbs red wine vinegar
  • 1tbs brown sugar
  • Cooking oil
  • 1tps chilli paste


Method:
Peel the cucumbers, then cut in half lengthwise, and then each strip again in half to give four strips. Using a knife, remove the seeds and pith. Cut the remaining strips into large bite sized chunks. 


Toss the cucumber and the salt together in a bowl and set aside for 10 minutes to draw out moisture.
Heat a small pan on medium heat.
Add the oil, then garlic and sichuan pepper. 
Cook until fragrant then remove from pan and set aside to cool. 
Drain the cucumbers in a sieve.
Mix the vinegar, sesame oil, sugar and chilli paste in a bowl. 


Pour all mixtures over the cucumbers in a bowl, and toss.
Redfridgerate until cold.


This dish works will as an accompaniment salad for other sichuan foods. It's a little less extreme than most Sichuan dishes, and the cucumber has a cooling, cleansing effect on the palate. I, however, don't mind scoffing this salad alone as a quick lunch in summer with a nice Sauvignon Blanc.


Thursday, November 5, 2009

Raspberry Truffles cure what ails ya

Raspberry Truffles! My second favorite truffle from Koko Black (first is the caramelized coconut and white chocolate... that will come soon!)

I was prowling through cooking websites today looking for something to satisfy my sweet tooth, the hungry hoardes at work, and as medicine for some niggling emotional hangups i've been having lately. With a broken cake pan, a broken food processor, and a broken whisk, my options were limited. Slice? Meh. Cookies? Bleh. Truffles? Oh yes indeed.

This is my first foray into the realm of chocolateering, and horror stories abound of the agony of tempering chocolate, having it curdle, having it grainy, having it burn. In the end, i didn't see what the big deal was. If you can make ganache... hell if you can boil and egg, you can make truffles.


Ingredients
  • 600gm semi sweet chocolate (use a chocolate you would happily eat plain)
  • 300gm frozen raspberries
  • 1/4 cup caster sugar
  • 1 cup double cream
  • Cocoa and icing sugar, to coat

Method
Chuck the raspberries in a blender and blend into a fine puree.


Pass this through a sieve into a saucepan and simmer with the caster sugar, stirring regularly, until the mixture is beginning to turn from syrup into a thicker goop.
Set aside.
In a double boiler (bowl over a pot of simmering water as per photo; do not let the water touch the bowl base), add the cream and chopped up chocolate.


Stir constantly until the chocolate is completely melted and mixed with the cream.


Add the raspberry mixture and stir well.
Refridgerate for 3 hours.
Lay out candy pans on a baking tray.


Set up cocoa and icing sugar (sifted) into two separate bowls.
Coat hands in either cocoa or icing sugar.
Scoop out a heaped teaspoon of the cold truffle mixture.
Roll into a rough ball (the longer you roll, the warmer the mixture will get, and therefore the stickier)
Drop into the coating mixture and roll around until well covered.
Place truffle into candy pan.
Repeat with half of the mixture for the cocoa and half of the mixture for the icing sugar.
Note: It's better to do all the cocoa at once, and then all the icing sugar, or vice versa. Do not alternative as the cocoa on your hands will mess up the finish on the icing sugar truffles.
Refridgerate until ready to devour!

Tuesday, November 3, 2009

Tea Smoked Chicken & Rice - REAL comfort food

This weekend i have been sick. Runny nose, fever, and general irritability that my long weekend has been sacrificed in the name of recovery. So, today, feeling particularly sorry for myself as i hear the Melbourne cup cheers coming from the Geebung Polo Club around the corner, i prowl my pantry for some feel-good food. Dehydrated chicken soup, you say? Never! Off to the supermarket, to make me some REAL comfort food. 

This is sort of a massacre of both Hainanese chicken and rice, and Taiwanese Hsuyn Gi or Tea smoked chicken. I'm not going for authenticity here so leave me alone!

Ingredients
  • 1 size 16 chicken
  • 3 cloves garlic
  • 6 coins ginger
  • Salt
  • Light Soy
  • Chilli Paste
  • Jasmine Rice
  • 1 tbs green tea leaves
  • 100gm brown sugar
  • Sesame Oil
  • Iced water (enough to douse chicken in)


Method:
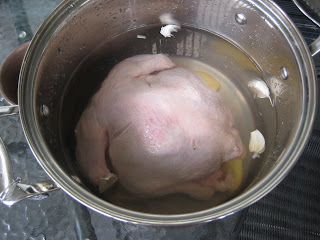
Bruise garlic and place in large pot with ginger, chicken, some salt, and enough water to cover chicken.


Bring to a boil and then simmer for 20 minutes.
Transfer chicken to ice bath and leave for 10 minutes.
Continue to cook liquid until reduced to 750ml and then set aside for later.


Remove chicken and set on cooling rack to dry for 15 minutes.

Smokin' time! (only try in a well ventilated room; hush your smoke detector for 15 minutes, and open the windows)


Place a doubled up sheet of aluminium foil on the bottom of cleaned pot.
Add the tea leaves and sugar on top of the foil.
Either set in the greased pot colander as per my photo, or place a greased cake rack on the bottom of of the pot.
Set the chicken into the colander or onto the cake rake.
Put on the lid.
Heat over very high heat until thick smoke is coming out of the pot.


Take the pot outside but leave the lid on for 5 minutes.
Take off the lid and place the chicken on a cutting board.
Whilst still warm, brush sesame oil over chicken to form a glaze.
Cut the chicken into pieces desired for serving and refridgerate until needed.


To cook the rice:
Rinse the required amount of rice (1/2 cup per person) under water and then leave to drain for 10 minutes.
In a pot, heat 1 teaspoon of oil per 1/2 cup of rice.
Add the drained rice and saute for 5 minutes or until the rice smells toasty.
Add approx 2/3 cup of reserved stock per 1/2 cup of rice, briefly stir, and then place lid on pot.
Simmer lightly until bubbling stops and all liquid has been absorbed.
Let rice sit for 5 minutes before transferring to serving plate.
Serve chicken cold with hot rice, wilted greens, chili paste and soy sauce. You can also serve as small side bowl of the chicken stock as a soup to go with the meal.